Introduction
Millions of Apps are available on the Play Store or Apple Store. Among these Apps, standing out and keeping the user engaged is very challenging in today’s competitive world. As per the survey, around 28% of the Apps would be uninstalled within 30 days of installation. Another survey as per Statista states that, around 25% of the Apps downloaded worldwide are used only once after installation.
So, the big question is how do we keep the user engaged with our App? One tactic to keep the users engaged is through Push Notifications. Push Notifications is a very effective channel through which you can communicate with your target audience in an efficient manner. Push notifications is a powerful tool because of the benefits it offers. Let’s see what benefits it offers,
- User retention and engagement
- The user conversion rate can be increased
- Various user metrics can be tracked
- User experience can be increased
- Promotions
Why think, let us go ahead and implement the push notification. In this article we are going to show how easy it is to implement a push notification in Flutter using Google Firebase Cloud Messaging on Android.
-

Follow our tech founder for more valuable tips, tricks, learning, content and future opportunities
Firebase Cloud Messaging
Firebase Cloud Messaging (FCM), formerly known as Google Cloud Messaging is a cross-platform messaging solution that lets you reliably send messages at no cost. You can send notification messages to drive user re-engagement and retention. Let us understand a few things about FCM before we dwell into the implementation,
FCM Architectural Overview
FCM relies on the following set of components that build, transport, and receive messages:

1. This is the tooling used to compose or build the message. This provides a GUI based option for creating the notification requests.
2. This accepts the messages, performs fanout of messages via topic to generate a message metadata like message Id.
3. This would route the messages to the devices targeted. This handles the delivery and applies the required platform-specific configurations. This contains,
- ATL for Android devices
- APNs for Apple devices
- Web push protocols for web applications
4. FCM SDK would be on user’s devices to handle and display the messages.
FCM Account Creation
To begin, we need to setup an account on Firebase. Below are the steps we need to follow for setting up Google Firebase for push notification in Android.
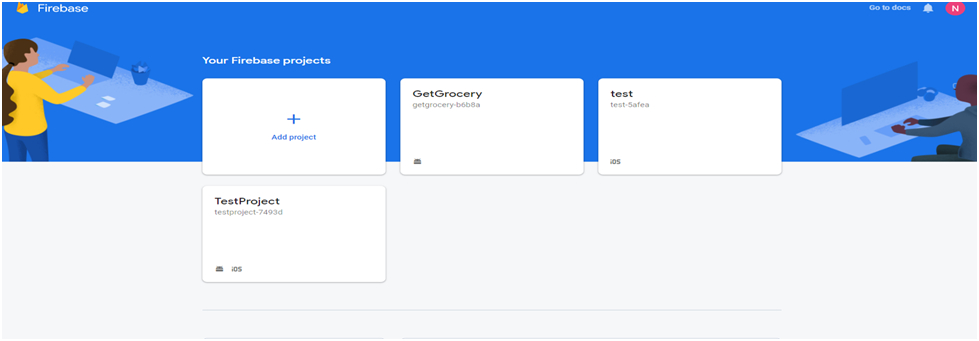
Step 1: Go to Firebase Console
Step 2: Enter the project name
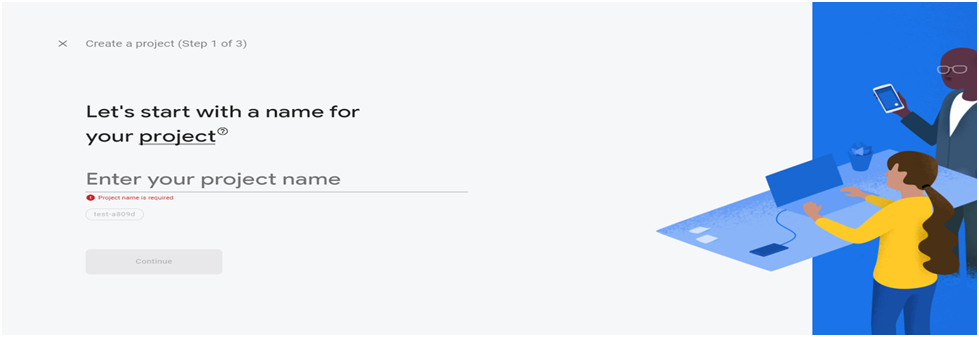
Step 3: If you need the analytics of the app select it otherwise it can be ignored.
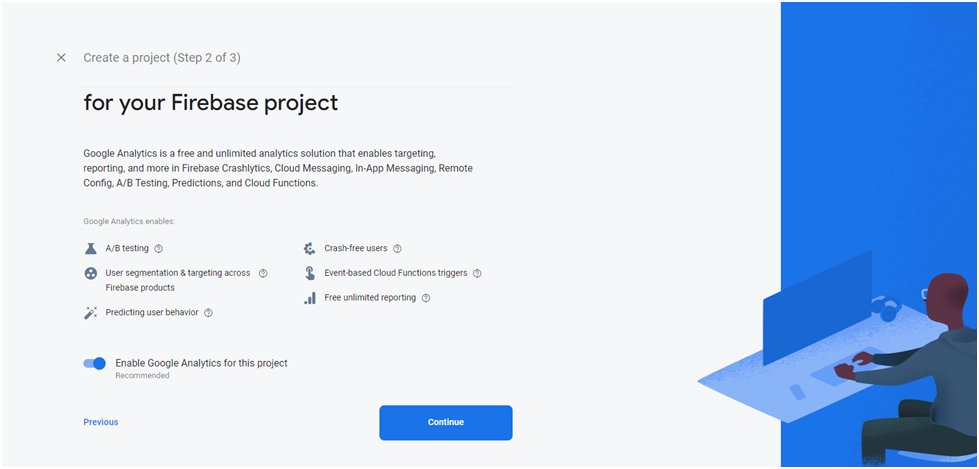
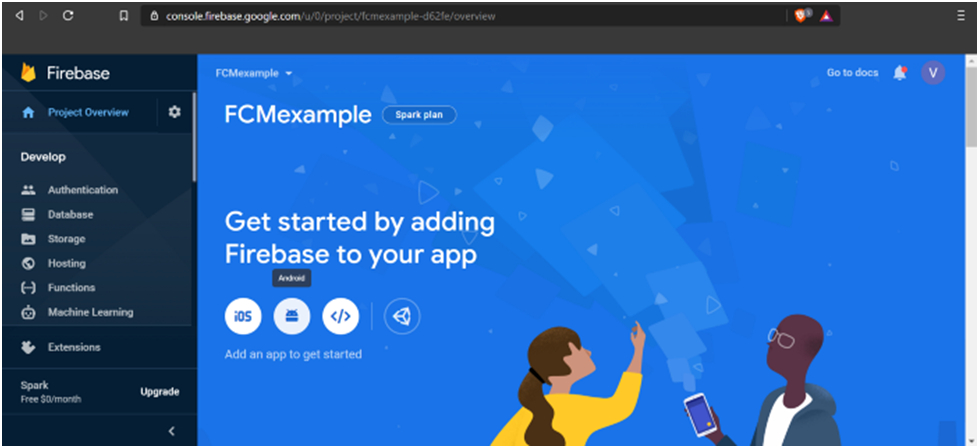
Click on continue to create a project. After a project is created in Firebase, add an App for which we have to implement the push notification.
Step 4: Since we are implementing the push notification for Android, click on Android to add the App.
Step 5: Enter the android package name, app nickname and SHA-1 signing certificate key.
Note: App nickname and SHA-1 signing certificate key is optional.
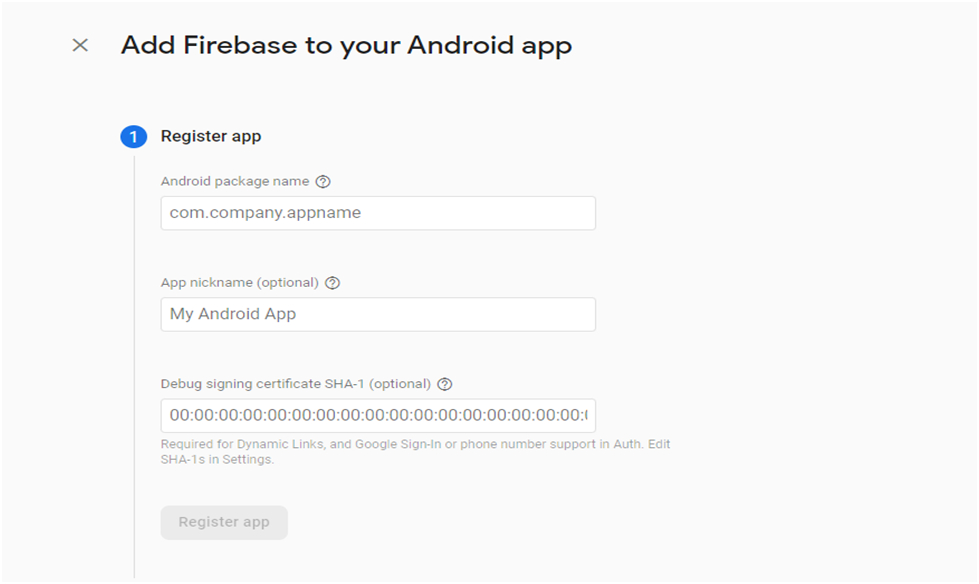
After entering the details, click on the Register app button.
Integrate FCM
After successfully creating an account on Firebase and registering the App, we are done with the initial setup. Now, we have to make the required changes on the App to implement the Push Notification. Let us follow a stepwise guide to keep things simple. Below are the steps to be followed on your mobile App to integrate the FCM,
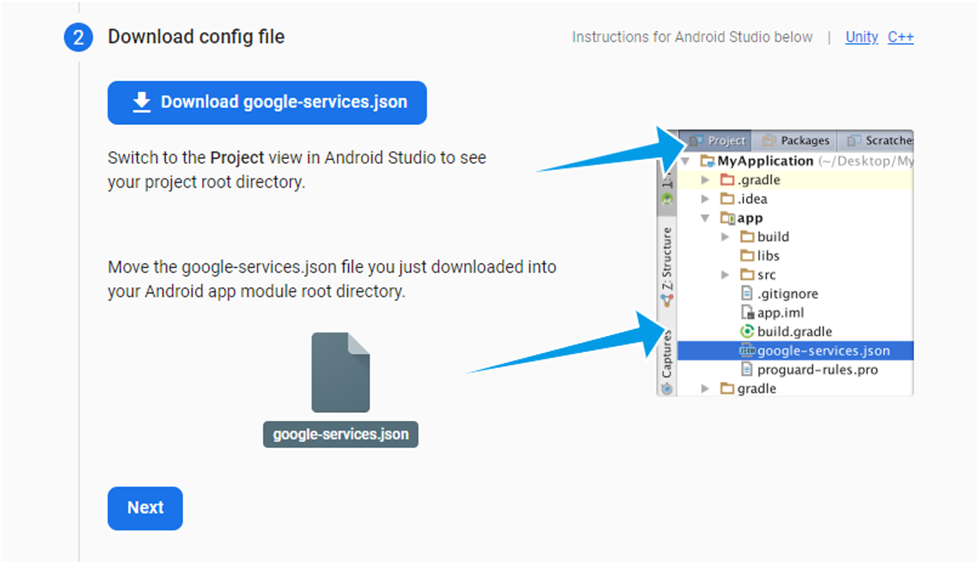
Step 1: Upon successful registration of the App would generate a json file called google-services.json. Download the file and place that file inside the app folder of your App as shown in the screenshot below.
Step 2: Modify your app’s build.gradle file (/build.gradle) to add a few lines of code as shown below,
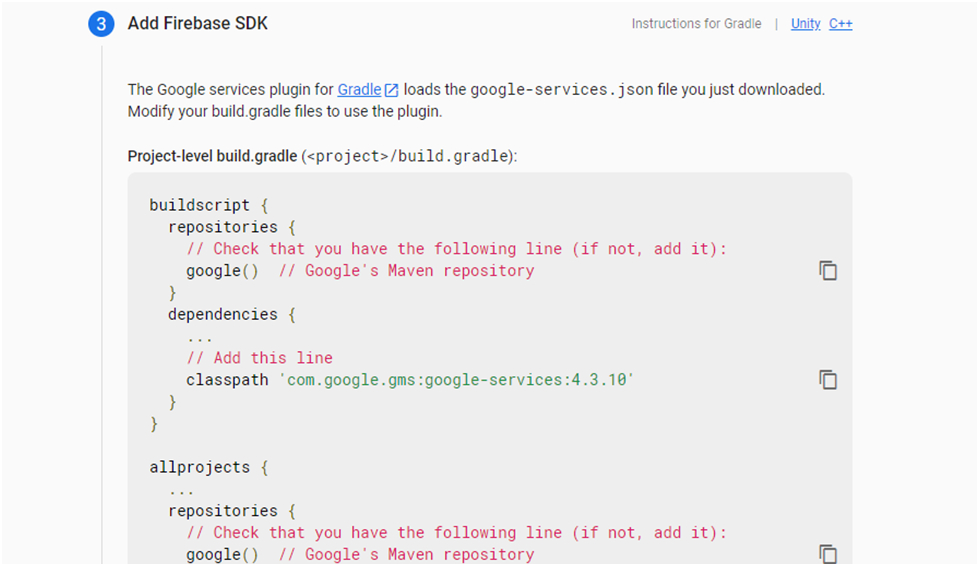
Step 3: In the app level build.gradle file (//build.gradle) add a few lines of code as shown below,
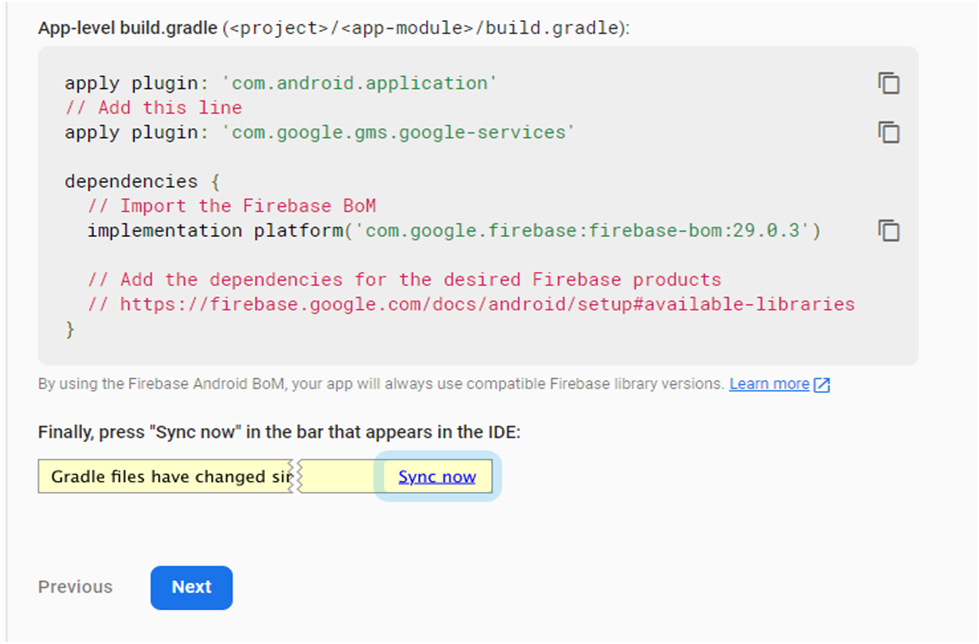
After modifying both the build.gradle files, click on the Sync now on your Android IDE and you are all set.
Step 4: Add the below packages to your Flutter project using the Flutter CLI command,
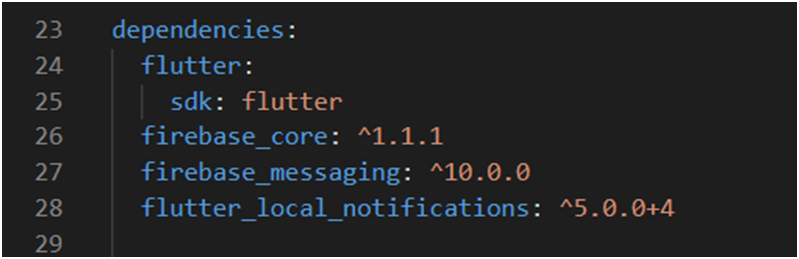
- firebase_core
- firebase_messaging
- flutter_local_notifications
Step 5: After the packages are added, verify your pubspec.yaml file which should look like as below,
Step 6: Now, in the main.dart file add below lines of code above the main() method,
Future<void> _firebaseMessagingBackgroundHandler(RemoteMessage message) async {
  // If you're going to use other Firebase services in the background, such as Firestore,
  // make sure you call `initializeApp` before using other Firebase services.
  await Firebase.initializeApp();
  print('Handling a background message ${message.messageId}');
}
Inside the main() method add the below lines of code,
void main() async {
  WidgetsFlutterBinding.ensureInitialized();
  await Firebase.initializeApp();

  FirebaseMessaging.onBackgroundMessage(_firebaseMessagingBackgroundHandler);
  await flutterLocalNotificationsPlugin
      .resolvePlatformSpecificImplementation<
          AndroidFlutterLocalNotificationsPlugin>()
      ?.createNotificationChannel(channel);

  await FirebaseMessaging.instance.setForegroundNotificationPresentationOptions(
    alert: true,
    badge: true,
    sound: true,
  );
  runApp(MyApp());
}
Add the below lines of code after the main() method,
const AndroidNotificationChannel channel = AndroidNotificationChannel(
  'high_importance_channel', // id
  'High Importance Notifications', // title
  'This channel is used for important notifications.', // description
  importance: Importance.high,
);
final FlutterLocalNotificationsPlugin flutterLocalNotificationsPlugin =
    FlutterLocalNotificationsPlugin();
The above code added so far are basic configurations for the notification. Now, we should add some code inside the widget to show the notification and handle the notification.
Class_MyAppState extends State<MyApp> {
@override
  void initState() {
    super.initState();
    var initializationSettingsAndroid =
        new AndroidInitializationSettings('ic_launcher');
    var initialzationSettingsAndroid =
        AndroidInitializationSettings('@mipmap/ic_launcher');
    var initializationSettings =
        InitializationSettings(android: initialzationSettingsAndroid);
    flutterLocalNotificationsPlugin.initialize(initializationSettings);

    FirebaseMessaging.onMessage.listen((RemoteMessage message) {
      RemoteNotification notification = message.notification;
      AndroidNotification android = message.notification?.android;
      if (notification != null && android != null) {
        flutterLocalNotificationsPlugin.show(
            notification.hashCode,
            notification.title,
            notification.body,
            NotificationDetails(
              android: AndroidNotificationDetails(
                channel.id,
                channel.name,
                channel.description,
                color: Colors.blue,
                // TODO add a proper drawable resource to android, for now using
                //      one that already exists in example app.
                icon: "@mipmap/ic_launcher",
              ),
            ));
      }
    });

    FirebaseMessaging.onMessageOpenedApp.listen((RemoteMessage message) {
      RemoteNotification notification = message.notification;
      AndroidNotification android = message.notification?.android;
      if (notification != null && android != null) {
        showDialog(
            // context: context,
            builder: (_) {
          return AlertDialog(
            title: Text(notification.title),
            content: SingleChildScrollView(
              child: Column(
                crossAxisAlignment: CrossAxisAlignment.start,
                children: [Text(notification.body)],
              ),
            ),
          );
        });
      }
    });

    getToken();
  }


String token;
getToken() async {
  token = await FirebaseMessaging.instance.getToken();
}
Testing
We are done with the implementation of push notification. Hope it is very easy. Now, let us see how the notification can be tested. We can test Push Notifications in 2 ways.
1.Through API.
2.Firebase Console.
Using FCM API
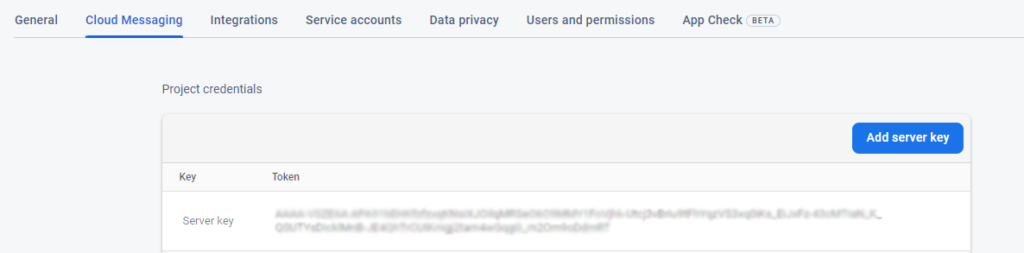
In this approach, we can use the Postman to test the push notification. Firebase provides an API https://fcm.googleapis.com/fcm/send to send the push notification. The API uses a token to authenticate the request. The token can be found in the Firebase console. To get the token navigate to project settings → Cloud Messaging section which is as shown below,
After getting the token, you can place the request in the Postman as shown below.
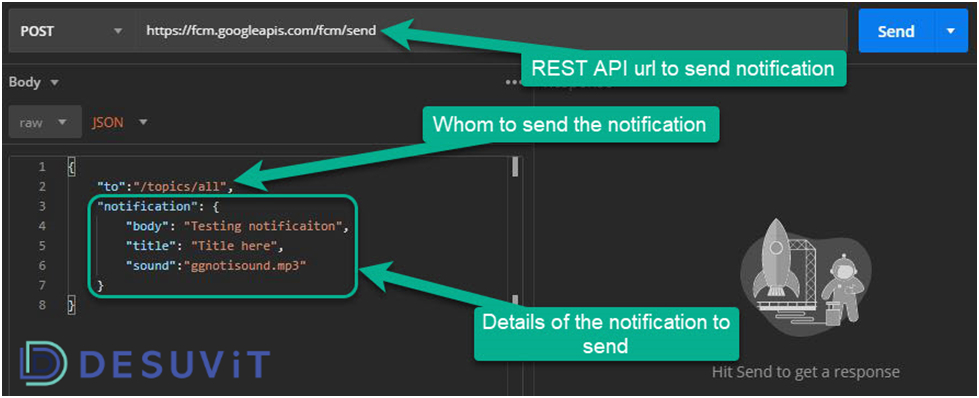
Note: We have used “to” as a topic, where during registration(refer to the register event in App.js), we have subscribed to “all” topic(all is the name of the topic here) and when we send the notification to the topic, the notification would be sent to all devices registered to that topic.
If you want to send the notification to a particular device, then instead of the topic, we can use the FCMToken.
In real time, most of the cases we might have to send the notification programmatically on a certain trigger and the easiest way is to use the rest API, where we can pass the required information of the notification through the body as simple JSON.
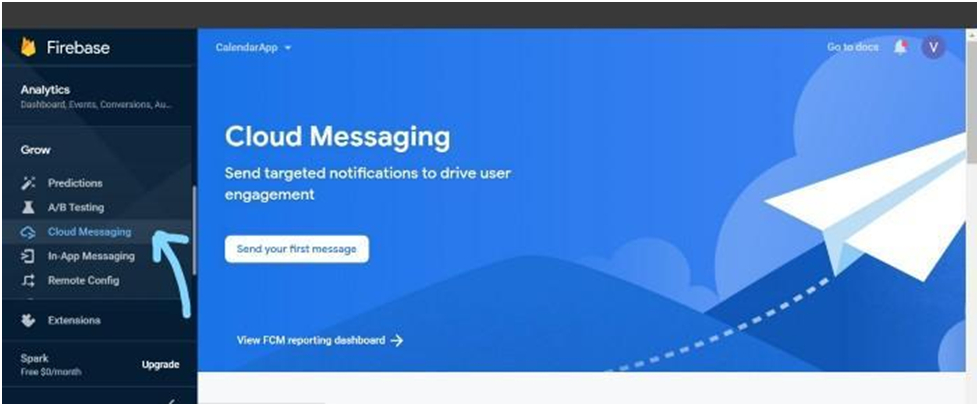
Using FCM Console
In this approach, we can send the notification directly from the FCM console. To send a notification, go to Firebase Console → Cloud Messaging and click on Send your first message.
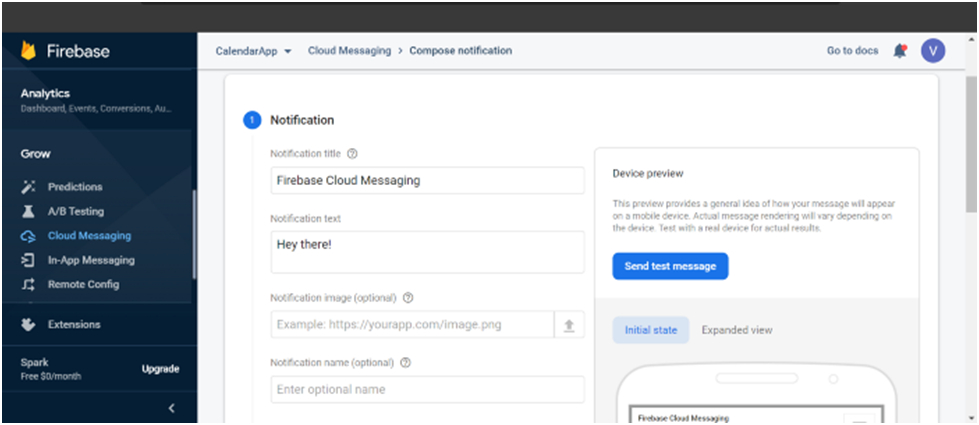
Then enter the Title and body field.
If you wish to send it to a particular device then click on Send test message and enter the FCM registration token.(Enter the current FCM registration token).
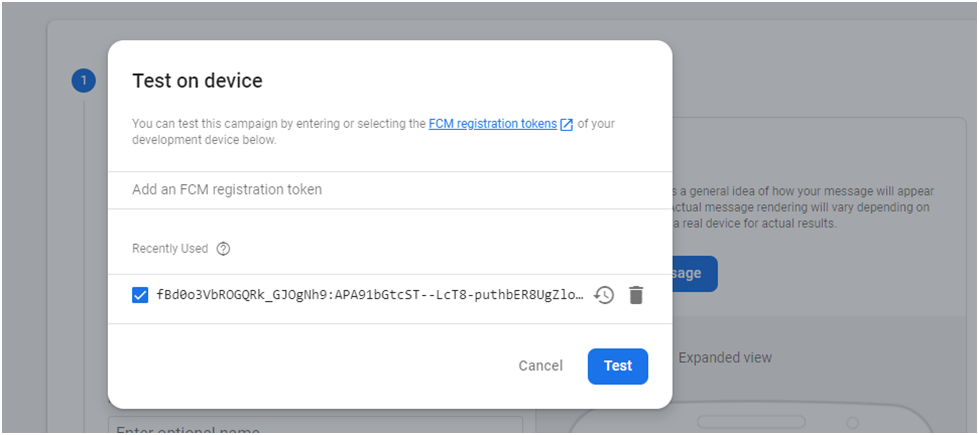
Finally, click on Test. Hurray!!! You should now get a notification on the device.
Desuvit is a Norway-born software development company delivering Custom Software Development, Mobile Apps, and Web Applications Development for various verticals and business domains. We offer end-to-end solutions for companies with no software or IT division, Startups, and companies that need to scale their software development efforts but lack the expertise required. We help our clients in growing their businesses so we can grow with them. Some of the technologies we work with: .Net, Azure, Microservices, Azure functions(Serverless computing), React Native, Flutter, React JS, TypeScript, Angular, NServiceBus, Azure Service Bus, Azure Queues, SQL Service, MySQL, Cosmos DB, etc.
Enjoyed this article? Subscribe for more valuable and great content !
By subscribing, you agree with our privacy policy and our terms of service.